
Roles and permissions: custom roles for employees
Administrator, Manager and Agent do not fit everybody: an intern does not need broadcasts, a senior operator needs reports but not billing. Here is how to create your own role based on a system one, what it sees and can do, what limits it and how to replace a role when deleting it.
What you need to know
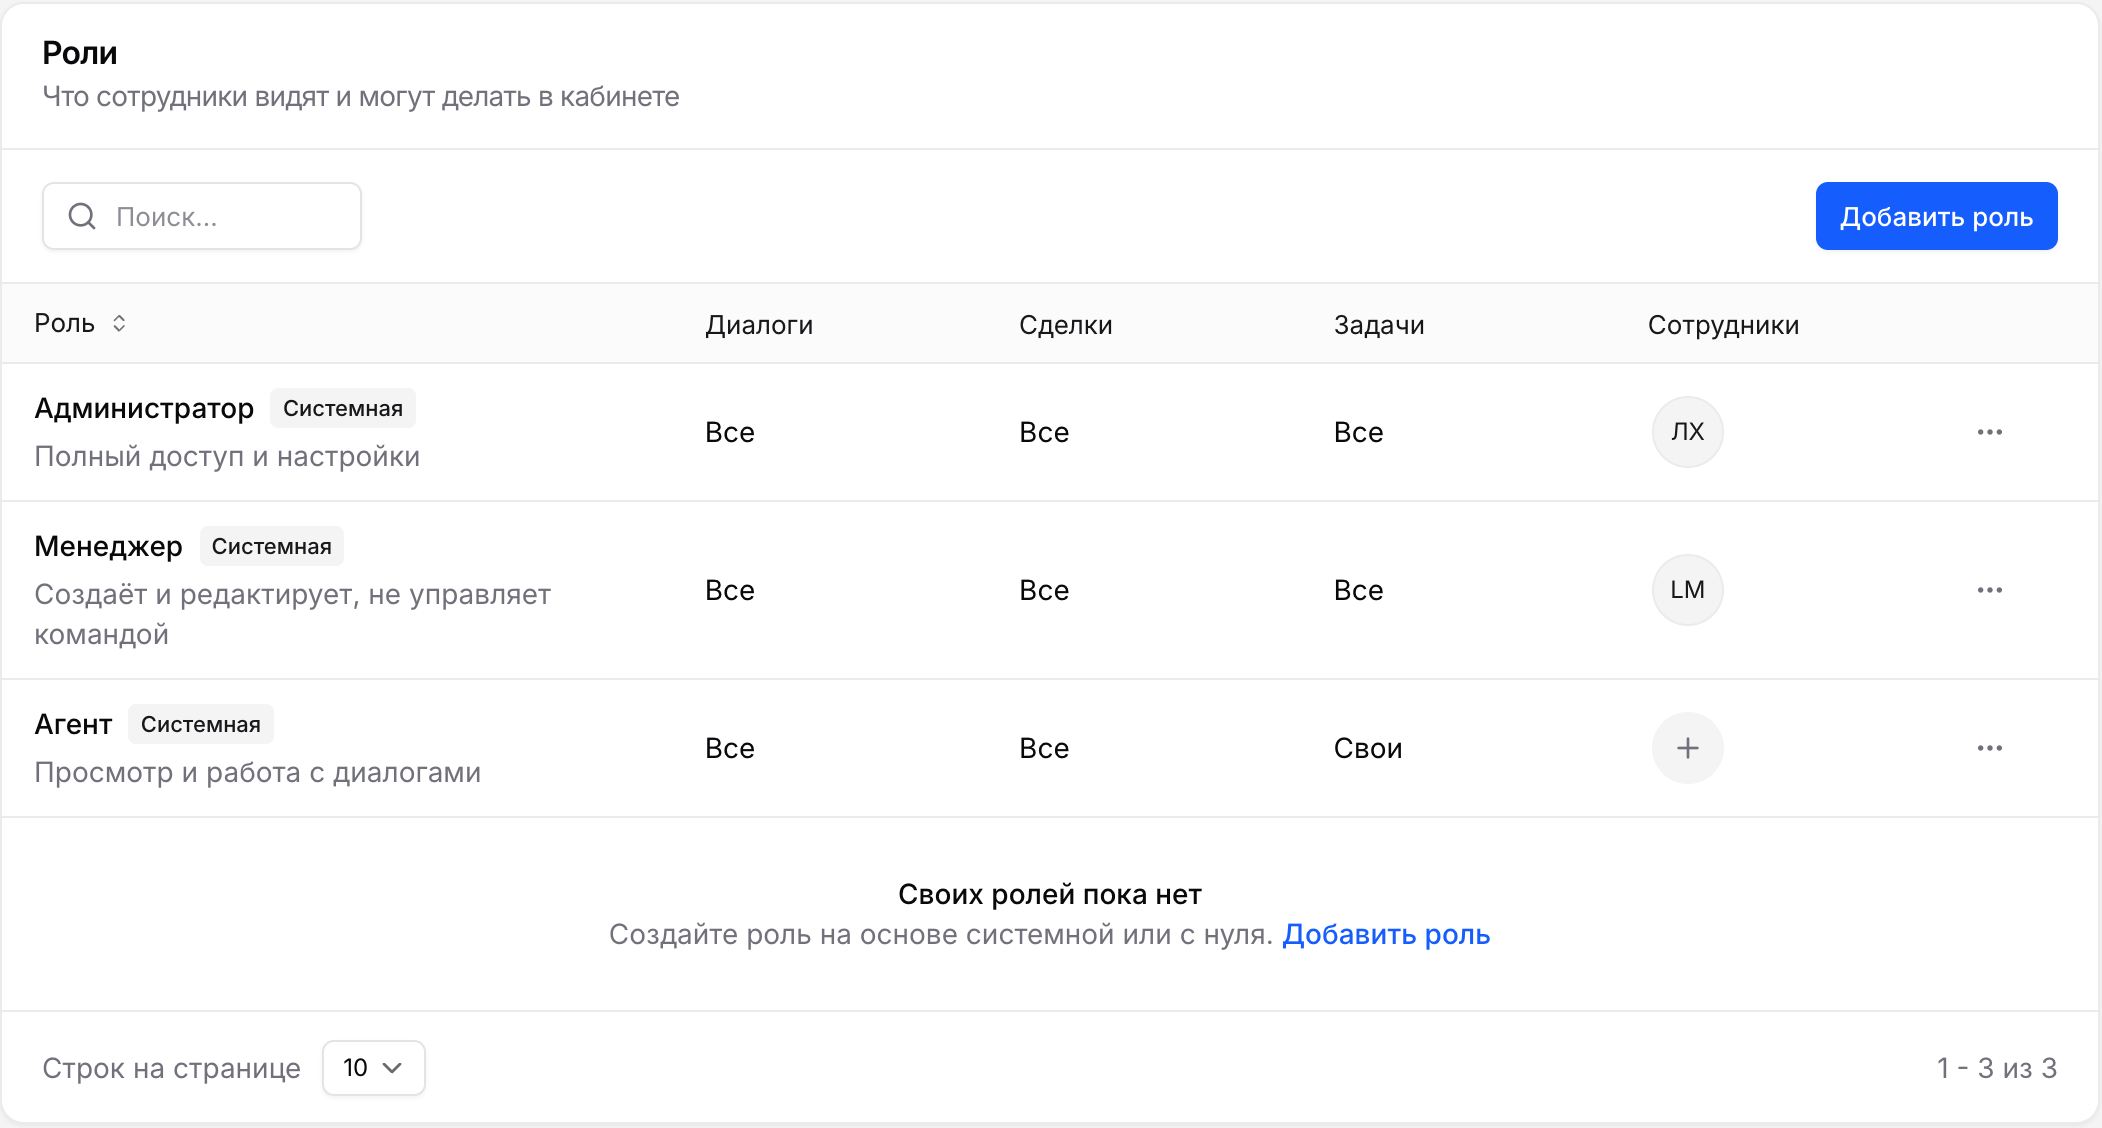
- Roles are set up in Settings → Team → Roles. Only an administrator can change them; other employees see the list and can open a role to view it.
- Creating your own roles is available on the Business plan. Plan contents: aisar.app/#pricing. The system roles Administrator, Manager and Agent are available on any plan.
- You can create up to 20 own roles; a role name is up to 60 characters and unique within the company.
- Changes apply immediately: the employee does not need to sign in again. Every role change is written to a log that support uses to sort out disputed cases.
Step 1. Open the role list
The list has two groups: "System" and "Own roles". For each role it shows the visibility levels of conversations, deals and tasks and the number of employees it is assigned to. System roles cannot be changed, but you can create your own on their basis.
Step 2. Create a role
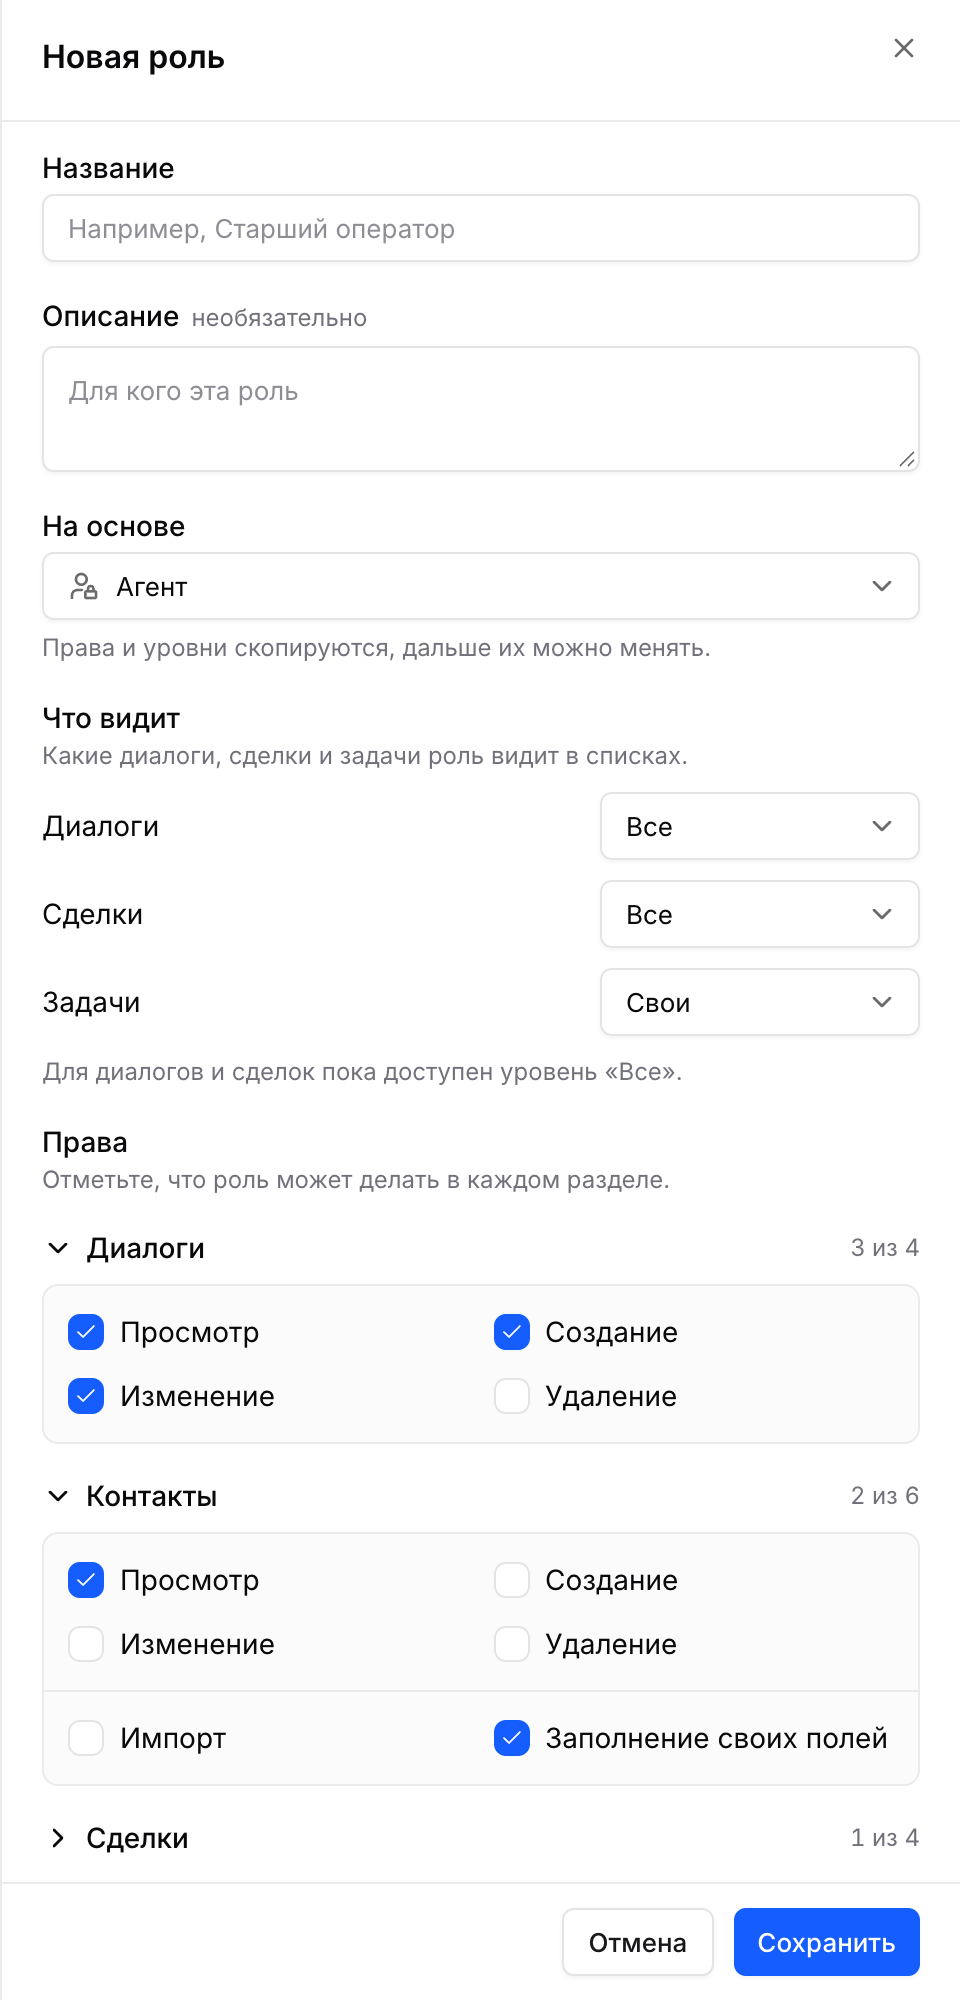
Click "Add role". Enter a name (for example, "Senior operator") and, if you like, a description. In the "Based on" field choose where to start: a copy of Administrator, Manager, Agent, another own role, or "From scratch". Permissions and levels are copied and can be changed afterwards. The same copy can be made from the row action menu: "Create based on".
Step 3. Set what the role sees
The "What it sees" block defines which conversations, deals and tasks the role sees in lists. The levels are:
| Level | What it means and where it is available |
|---|---|
| All | All records of the company. For conversations and deals it is the only one available for now. |
| Own | Only the records the employee is responsible for. Available for tasks now. For conversations and deals it will come later. |
| Team | Records of the employee's team. Coming later; marked "soon" in the editor. |
Step 4. Tick permissions by section
In the "Permissions" block the sections go in order: conversations, contacts, deals, tasks, telephony, broadcasts, quick replies, stickers, AI employees, automation, channels, reports and export, funnels, tags and custom fields, teams, working hours, SLA and distribution, integrations. In each one tick what the role can do: view, create, update, delete. Each section shows how many permissions are ticked.
- Assigning and closing conversations are part of the "Conversations: update" permission.
- Sending messages is part of the "Conversations: create" permission. Viewing messages is part of "Conversations: view".
- Basic permissions (viewing the company, the employee list, notifications and tags) are granted to every role and are not shown in the editor.
Company-wide permissions and the "All" level
Some permissions concern the whole company rather than single records: scenarios, AI employees, broadcasts, reports and export, creating and changing teams, SLA and distribution. They can be ticked only when conversations and deals are at the "All" level. Otherwise an employee with limited visibility could get someone else's correspondence through a report or a broadcast. While the level is below "All", these checkboxes are locked with the hint "Needs the "All" level for Conversations and Deals".
Employees with restricted channels
If the administrator opened only some channels for an employee, the role does not cancel it but complements it. The dashboard, export and broadcasts of such an employee are built from their channels only. A scenario or an AI employee that works on a channel closed to the employee cannot be edited: the cabinet asks them to contact the administrator. Only the administrator grants channel access.
Step 5. Assign the role to an employee
Open Settings → Users. For an existing employee change the role in their card; when inviting a new one, choose the role in the invitation form. Own roles are listed next to the system ones. More about invitations: Users and roles.
Deleting a role
If the role is assigned to employees or invitations, when deleting you must choose a new role for them: without it the deletion is not possible. If nobody holds the role, no replacement is needed.
Security notes
- If you narrow a role, old notifications in the bell are not removed: they stay in the list even though the section itself is no longer accessible.
- Bitrix24 open lines are not narrowed by the role level: correspondence that goes through the integration stays visible under the integration's own rules.
- The company API token works with full administrator rights, whatever role its owner has. Keep it like an administrator password and issue it only to people you trust with full access.
Common issues
| Symptom | Cause and what to do |
|---|---|
| No "Add role" button | Only an administrator changes roles, and own roles are available on the Business plan. |
| Company-wide permissions (broadcasts, reports, AI employees) cannot be ticked | Conversations and deals are not at the "All" level. Set "All" back or leave these permissions off. |
| Cannot choose "Own" for conversations or deals | For now this level is for tasks only. For conversations and deals "All" is available. |
| A role cannot be created: limit reached | You can have at most 20 own roles. Delete an unused one and try again. |
| A role with this name already exists | The name must be unique within the company, 1 to 60 characters. |
| An employee cannot open a scenario or an AI employee | It works on a channel the employee has no access to. The administrator opens the channel or makes the change. |